Monday, worked on getting the W-SH-6 sheeting in place which invoked getting the 3/4” holes drilled. The process was as follows:
- Hold sheeting in its proper place
- Bring wing bolt up from the bottom of the wing and make an indentation in the bottom of the sheeting
- Mark the centre of the indent with a pen
- Drill 3/4” hole using my drill press
- Place tubbing in the ‘support’ previously glued around bolt holes on wing
- Slide sheet over the tubing and into place
- Mark on tubing where the top of the sheeting meets
- Cut tubing along the mark
- Repeat steps with tubing in place for second hole
Once that was done made some additional supports out of 3/32” balsa sheeting. These had the 3/4” holes drilled into them and then sanded to fit between the WDs. Once ensured fit with tubing thin CA was applied to keep the supports in place.
Next, thin CA was used to glue the actual W-SH-6 sheet in place. This was applied underneath the sheeting along where the sheet makes contact with a WD. Pressing the sheet down to avoid gaps and allowing the CA to wick underneath as it was applied, including along the ends as well. This was done outside so the wing could be tilted to allow the glue to run down the seam and avoid getting any on the flooring.
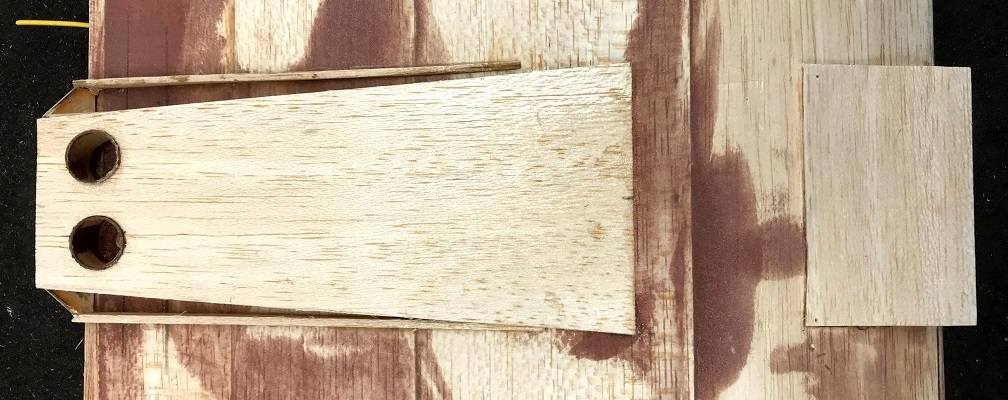
Last step for the day was getting the W-SH-7 piece glued on the front of the wing. Traced its location with a pencil and then applied wood glue along all the surface on the wing where the piece makes contact. Added pins to keep it in place and then added weight to keep the piece down while the wood glue dried. The weight on W-SH-6 is a counter weight to prevent the wing from moving.

W-SH-6 & W-SH-7 Weighted
The featured image is how everything looked the next morning. Hoping during my next session I will be able to get the hinge location made.