On Wednesday I was finally able to make some more progress on my wing. What was the hold up you ask? Well, I needed to make the WC assembly and the types of pieces and angles involved I couldn’t seem to get it done on my own. After telling a co-worker about it (Catherine) she graciously helped me with assembly.
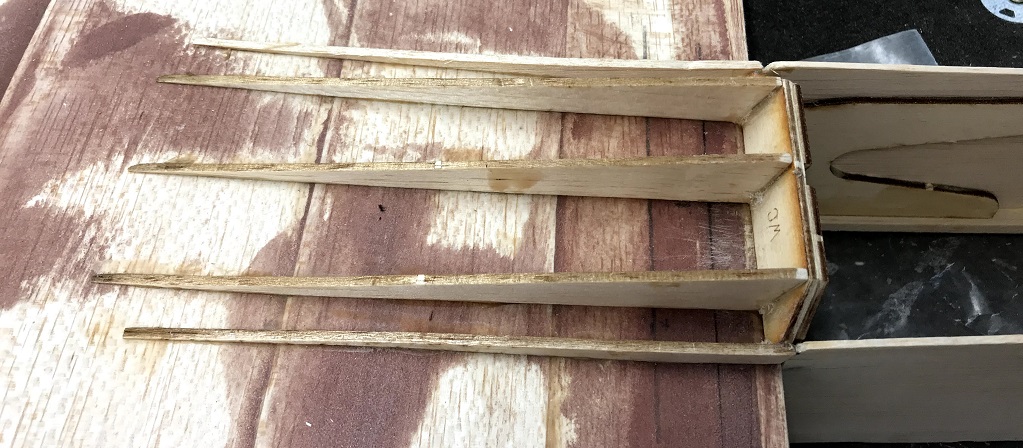
I brought the pieces to work and after our work day was done she became my extra set of hands and between the two of us, one holding and one gluing, we were able to get the WC assembly built… not perfect, but done. Medium CA was used, applied to the joints get the balsa pieces, two outer WE’s and three inner (bigger) WD’s, attached to the WC ply plate. Seen in the left pic below.

WC Assembly Built 
WC Assembly Top
Once I arrived home I was able to continue, completing Step 7, of the wing instructions gluing the WC assembly to the bottom, back of the wing. In the bottom left pic you can see the assembly weighted down while the glue dries. I also re-attached FU6B to the fuselage and clamped it and WC together. This didn’t turn out great and will need some filler/touch ups, but is the angle it needs to be in order to accommodate the wing.
In the morning I removed the weights. You can see the wing in the fuselage in the bottom right pic and another angle of the glued WC assembly to the wing in the featured image above.
I’m hoping this angle will work, after using some filler, etc. (likely after scraping out some glue where the piece didn’t adhere properly to the fuselage leaving a gap) to get things secured better it will all come together and work. I did test taking out and putting in the wing and that does seem to work as is just fine right now.

WC Assembly Glue Drying 
WC Assembly Front to Back
That wrapped up this long awaited session and though some apprehensions have creeped in as I have navigated a lot of this myself lately (consulting with Peter by phone and email where I can) it has been a great learning experience.