Yesterday afternoon I made minor progress on the aircraft. I started by continuing with work on the wing. I marked the center between the outter and inner WDs on the previously marked line indicating where the wing lines up on the center of the ply wing bolt plate in the fuselage.
I also cut 1/4” x 1/4” balsa stringer, FU-ST-2 to a length of 23 5/8“, to see how it would fit into the bottom of the fuselage and into FU6B… it isn’t perfect but workable once we touch up FU6B, the angled ply piece I put in with the WD assembly since their angles need to match up. I didn’t glue this piece into place yet as the other tasks still required on the fuselage will be easier with the spaces open.

I then gave Peter a call and discussed next steps for the aircraft, pondering what I might be able to do. This basically came down to drilling the holes in the wing, that I previously marked center for and building the W-ST-2 pieces.
This day I also sanded the WG’s to be flush with the edge of WF on the bottom front of the wing. I then made a piece out of 3/32” balsa, W-SH-7 in Step 8, that is approx 331/32” x 213/16“. I sanded a bit of a ‘slope/angle’ into the back so that, as I interpreted the diagram, the piece sat flush across the top of the WF assembly continuing onto the surface of the wing.
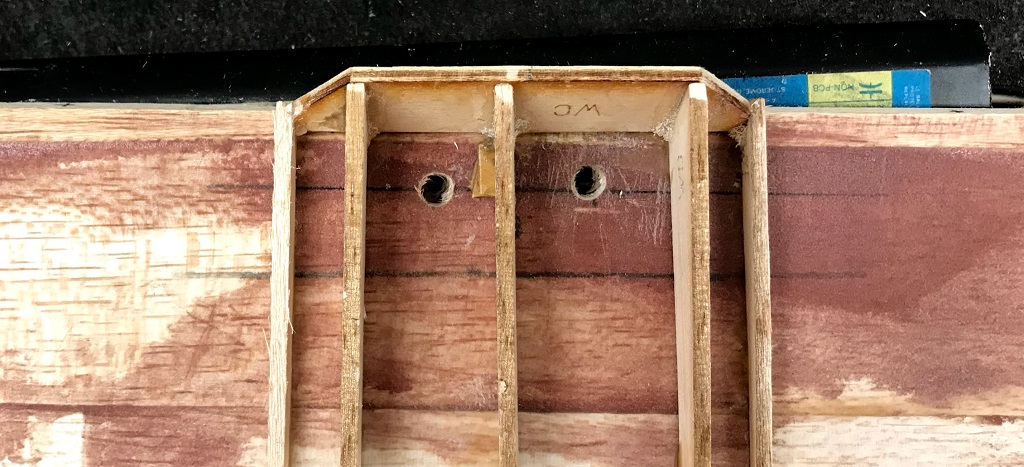
I then used my drill press to drill the holes into the wing. This was a unique experience as I had to manuever and hold everything in place myself while I did it. I was a little to eager on the first hole (right) and the second I did much better (left) as you can tell in the featured image, top of post. The right one is a little to far left and a little to close to the trailing edge.
I’m chopping this all up to live and learn experiences; hopefully, improving upon my craft to better be able to build aircrafts in the future.
I did place the wing back into the fuselage and mark with a pen through the holes to see where they are on the ply plate. I’m thinking it should work.
My next steps are to get the W-ST-2 pieces built and then glue them into place along with the previously made W-SH-7.