Yesterday, Peter was over and we got to work assembling the fuselage by determining what we can get done in which sessions. What we essentially got done this day was Step 2 (minus installation of former 10). I did start by sanding the excess glue off formers 3&4, previously glued together, drilling out the wing dowel bolt holes (so the dowels will fit through nicely), and cutting out the excess glue from the three slots in the top of the formers.
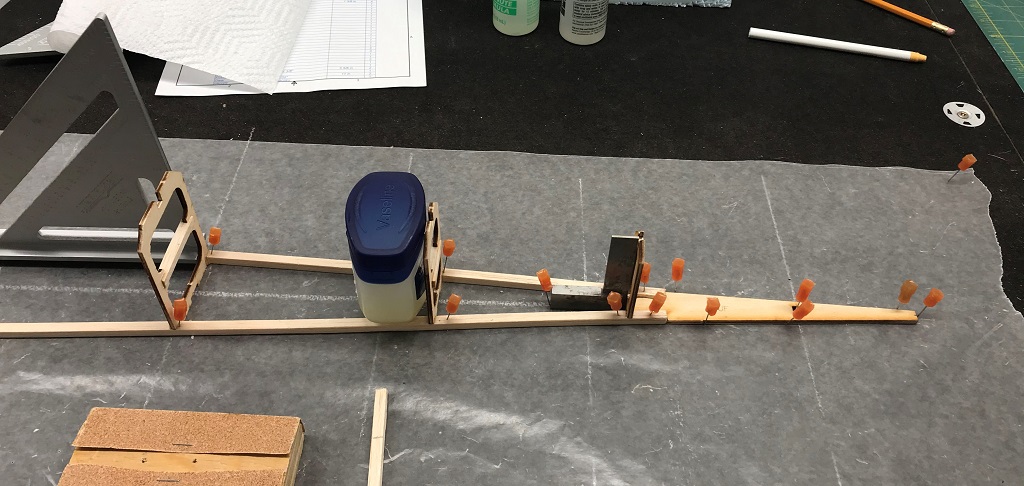
In order to get the back formers glued into place we had to assemble the formers (except the firewall F1) and doublers at the front as well, clamped into place to aid in determining spacing of the back formers. I marked the centers on formers 7 through 9 (F7-F9) using my centering ruler. The balsa stringer is elevated off the table when slotted into place in the doubler so we used some excess 1⁄4” x 1⁄4” balsa along with an excess 1⁄8” ply piece wedged under the stringer near the front (in the image below) ensuring everything was flowing from front to back correctly. I did have to do some very light sanding of one balsa stringer end at the back to ensure a proper fit with the tail piece (FUF).
It is neat, how if you have everything lined up and straight the placement of the formers is just where they fit (that is where the balsa stringer fits properly in the left and right slots on the bottom of the former). The diagram based instructions tell you nothing about measurements of where things should be.
You do need to make your own measurements though… this is where the previously made chalk lines come in handy. Ensuring the center marks on all the formers are lined up on the chalked center line on the table you measure from the nearest perpendicular chalk line to the former on each side. If the two measurements are equal then you know things are squared up that way. We did have to make some adjustments and added some aditional pins to help aid in keeping everything aligned.
Once places were determined I traced a pencil line on the balsa in front of each former and marked the back side with an ‘x’ (where the former goes back to). It was now time to glue.
Starting at the back I placed glue along the front edge of FUF and then placed it back between the two balsa stringers ensuring everything was snug and pinned into place. After placing glue on the corner slots of F9 I placed it into position using a square to ensure it was sitting verticle, the center lined up on the center chalk line, and a ruler to measure the distance of each edge from the nearest chalk line to verify they were of equidistance. This process was then repeated for F8 & F7 in that order.
Once all pieces were glued in place we verified everything was sitting properly and then touched nothing… well there was some fumblings and resets inbetween ;).
You can see in the image below that a case of beer can be repurposed :D. The block of wood helped ensure the front of both doublers were even.
