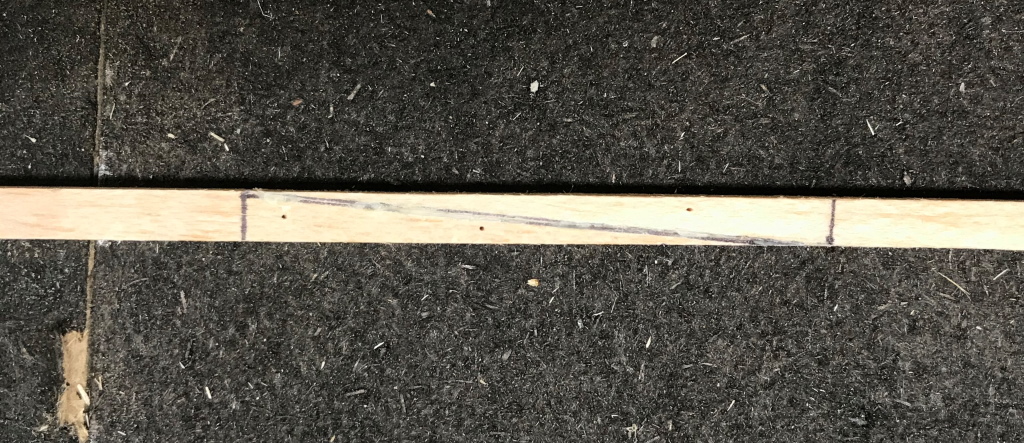
Wednesday Peter came over after we both had some time to contemplate what we were missing the session before. Due to my lack of experience I would have been hard pressed to come up with the correct answer; however, Peter determined what the diagram was trying to tell us and that was…… *drum roll please*…. a scarf joint!
As you can see in the featured image above the length of the balsa stringers needed to be extended/strenghtened via a scarf joint. The way this work is you want the joint to be 8 to 10 times the length of the thickness. In this particular case we are using 1⁄4” balsa and Peter made the joint length 12 times the thickness. Which is 12x1⁄4“=3”. This is cut at an angle from the top at the measurement to the bottom at the end of the balsa stringer (repeated for the piece that is going to fit on top).
We re-pinned everything down and in the next session, hoping, we will actually glue what we trial fitted last time into place. This session, however, we did some more sanding to make sure all the pieces were ready.
To ensure the balsa stringers are flush with the outer edge of the doubler we measured and cut a 1⁄4” x 1⁄8” piece out of the bottom corner of former four so half the stringer width fits underneath.
Lastly I glued formers 3 and 4 together using 30 minute epoxy and clamped it into position, as seen in the image below.

Next time will hopefully be getting the formers and doublers glued into place on the stringers.