Yesterday Peter came over to assist with getting the fuselage situated. He brought a china marker (white) to make a straight line on the table, providing a center point for the fuselage. I marked the center on the bottom of each former so that we could ensure the fuselage is center properly.
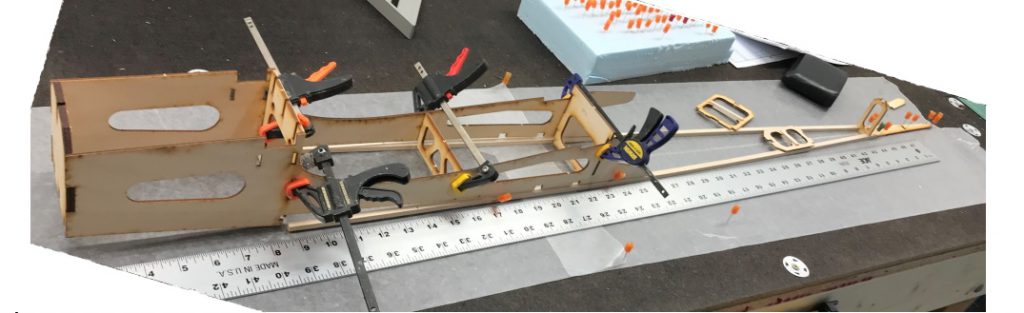
The very tail piece was center and pinned into place at the far right (matching the diagram instructions) and two 1⁄4” x 1⁄4” balsa stringers were pinned in place. Based on the diagram I figured the spacing would be determiend by this step as they do not state how far each former needs to be from the next. When we placed all the pieces together as shown in Step 3, FU 2-10, and campled them into place (no gluing, this is purely a dry run) we determined that this was not the case and to top it off couldn’t figure out how the stringers were to fit into the slot of the front side pieces (FUA’s) as from what we could tell the outer edge should be smooth; however, the stringers definidfely protruded at the front… even though we never cut it down to size, this wouldn’t have mattered for this case. We did, however, move the ‘front assembly’ back and forth along the stringers to see if we could make sense of the situation. The side panels of the aircraft are to be 51 inches long so we were trying to get all the numbers to work out based on the lenth of the tail wheel plate at the back of the fuselage, the stringers (FU-ST-1 – which are suppose to be 377⁄16” in length), and FUA’s (believe these to be the doublers for added support to the engine block, etc. at the nose of the aircraft). We seemed to be 2″ short and didn’t think this was accounted for by the forming/fitting of the side panel to the formers.
These steps are critical and need to make sure everything is positioned correctly along the stringers and at right angles; because if it is off at the back it will only get worse as you move towards the front, each step along the way exacerbating the situation (that is potential twisting/warping of the fuselage). You can see how we left things in the image at the top. We decided to pause and let things perculate for a while. If you are not sure then don’t proceed. Will likely get some additional input from other modellers before moving forward… stay tunned.
What I did get done this day, besides contemplation and discussions around the fuselage, is gluing what appears will make up the landing gear block (FUD & 2 FUDA’s stacked on top) glued together by mixing up some 30 minute expoxy. You can see them clamped together drying below:

In conclusion, though this day was not as fruitful as we were hoping, troubleshooting/problem solving and discussing with our fellow aeromodellers is part of what this hobby is all about!
With luck, I’ll be able to make more progress later this week.