On February 15th Peter came over and we furthered our progress on the wing. Prior to getting to work we needed to study the ‘instructions’ and looking closely at the diagram, Step 3 of the wing section, I could determine there were shear webs (WJ in the diagram) front and back of the main spar. Since there were indeed 16 WJ pieces this made sense to us.
I proceded by cutting them out of the provided sectioned balsa sheets. I then marked the center on each web as well as the center between each rib on the main spar so we could use these markings to center the webs when gluing.
Though not a shear web we also put into place (Step 2) the pieces WA and WB, which goes bewteeen the two middle ribs that are closer together. This is made out of 1/8” ply and provide the wholes for the dowels. Since they were to wide to fit I used Peters belt/disc sander to take equal amounts off of each side until it fit. I took a little to much off of WB so when gluing it to the inside of the leading edge we did our best to center it horizontally. Vertically we needed to make sure it was placed right so the sheeting would be able to come over top to but up against the leading edge.
I broke up a bunch of popsicle sticks to clamp to, distributing the weight across the web, and mixed up a batch of slow drying epoxy. Applying to top and bottom of the web Peter then held the two pieces in place as I applied the clamps.
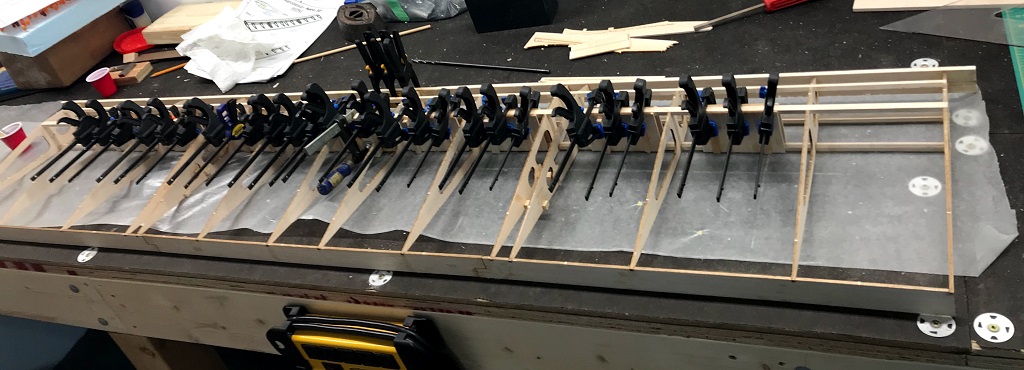
In the featured image above you can see all the shear webs clamped into place while the glue dries. Below is a close-up of the shear webs glued and clamped in place.

That wrapped up the first session of our long weekend building extravaganza! 😛