Yesterday evening I did some work on my aircraft for about an hour after I got home, prior to getting supper.
I started by cutting out the ribs for the stabilizer… I guess technically I should be calling this the horizontal stabilizer as what I’ve been calling the fin is probably more properly known as the vertical stabilizer :).
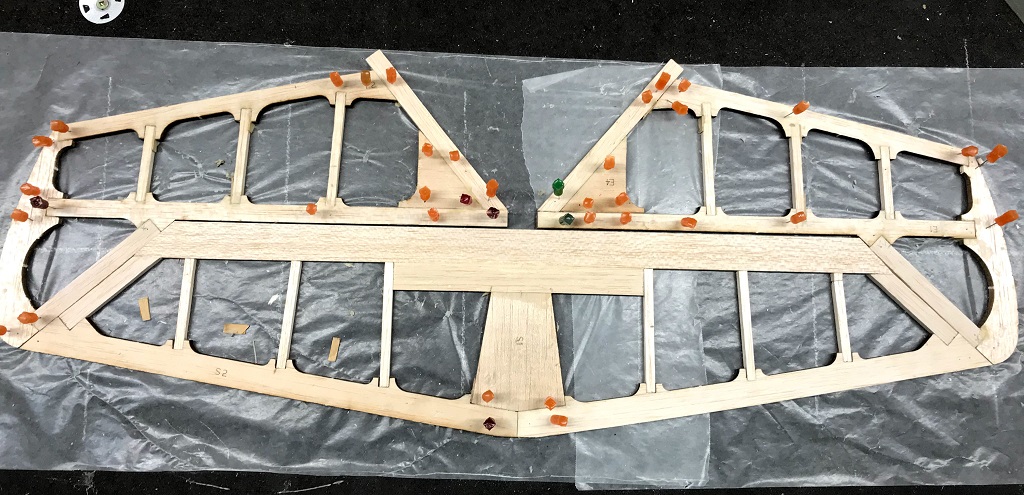
Once I had the six ribs cut out of 1⁄4” x 1⁄4” balsa to length I trial fitted them and ended up cutting three filler pieces for the three left ribs. In the picture above, you can see the filler pieces laying in the openings between ribs. The lengths of the ribs from left to right in the featured image are 27/16”, 215⁄16”, 33/8”, 33/8”, 3”, and 21/2”. Chop that up to being human as in an ideal world they first and second set of 3 (left and right ribs of the stab) would be equal length.
You may notice the far right rib has a ‘seam’ at the top. I measured twice, but incorrectly remembered the measurement, so I was short and used thin CA to glue a left over piece to the top and then sanded to fit. Will see if I stick with that or replace the entire rib before gluing.
I then moved on to cutting the 1⁄2” x 1⁄4” balsa oversided and then shapped and sanded to lengh & fit, 21⁄2”, to make up the left and right sides of the stabilizer. The angle is 45 degrees.
Lastly I moved on to the fuselage and got started on sanding the sides of the aircraft down so the sides are smooth with the top of the doublers for the wing craddle. You can see in the image below how I got the closer front side down about half way back before I had to stop for the evening.
I will continue tomorrow with gluing the ribs in place and finish sanding down the sides of the fuselage.
