Yesterday Peter came over and looked at what I had laid out for the fin & rudder so far.
We then moved back to the stabilizer and got the trailing edge and ‘intermediary’ piece cut to size. Starting with the trailing edge we did the following:
- Cut the end off at a 45 degree angle using a mitre box
- Lined it up in place and marked with a pencil on the inside edge where it goes to
- Cut it at a 45 degree angle, a little oversized
- We were happing with the fit on the left side (image below) so sanded the right side repeatedly until happy with the overall fit
Once the fit was as we wanted we moved on to the inside piece, going between the trailing edge and S1. This involved:
- Using a plastic triangle to line up with the inside of the rib to determine how far to the one side the piece would go
- Then doing the same on the other side
- This then gave the length of the balsa piece as it buts up to the inside of the ribs to the left and right of S1
- Measured the middle of the balsa piece & S1 to ensure everything was centered properly
Once these pieces were determined to be sanded down to fit right (211⁄8” on longer side & 7”) we used wood glue to glue the smaller piece to the top of S1 and the trailing ege to the top of the smaller piece, from the perspective of the image below. I applied glue to the top and bottom of the middle piece.

Next we moved on to the top of the rudder and glued the top together starting with the leading and trailing edge to R1 & R2. I then glued the middle piece (between R1 & R2) in place and lastly the two ribs, one on each side that go at a angle to the leading/trailing edge accordingly.
As seen in the image below once these pieces were glued into place a piece of wax paper was placed over top along with a weight to keep everythign tightly in place while the glue dried.

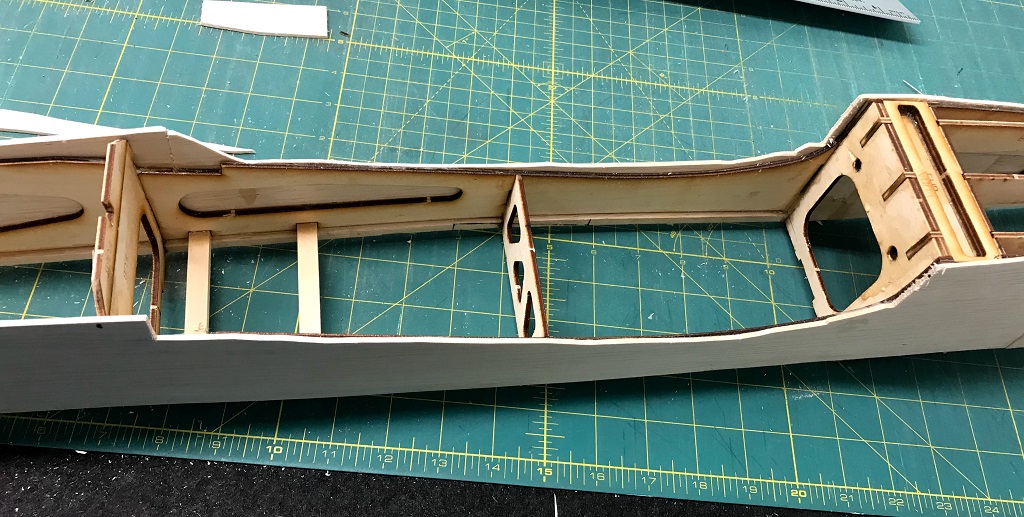
At this point we thought we were hooped for the day; however, we took another look at the fuselage and realized we could do some more cutting away of the balsa sheeting covering the wing saddle (seen in the featured image at the top). I also cut the excess balsa siding along the one side of the aircraft. This was done by sitcking a pin through at each former to determine how much I could cut off and then marking the location with a marker. We were then able to use this as a guide to lay a long ruler from front to back of the aircraft. We cut a little higher as one dot appeared out of place of the others; to ensure we have some play.
Once that was done we noticed where the glue hadn’t stuck fully and used some medium CA to drool down between the edge of the former and balsa. This was then clamped into place, seen in the image below.

My next tasks, hopefully this evening, are to get the ribs of the stabilizer cut and pinned into place and perhaps some more finishing of the wing saddle.