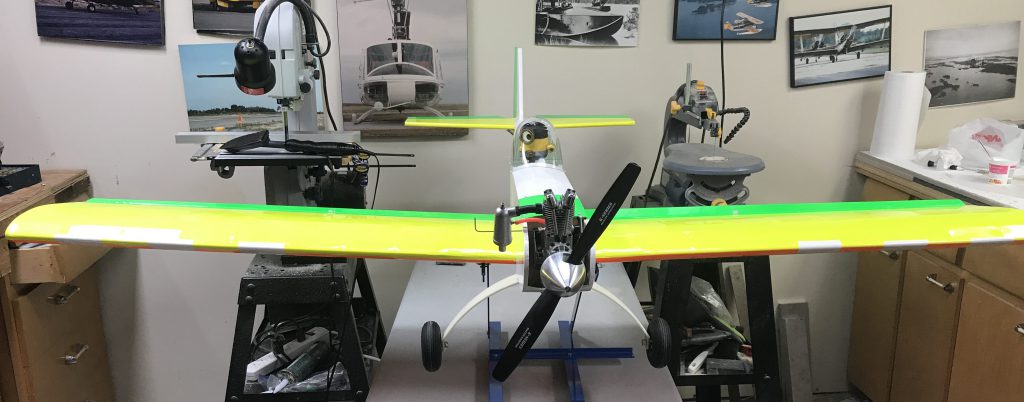
Tuesday was the day everything came together and I my aircraft was fully assembled. Previously in the week Peter & John balanced my plane to determine how much weight was required. The aircraft was quite tail heavy. Need to remember that as you move away from the center of gravity (CG) the effect of 1lb of weight is compounded. This means that even though the engine, wing, battery, etc. is all up at the front of the plane the tail still wanted to ‘sink’.
In order to counteract this John & Peter determined how much weight was required to place up in the nose so that the aircraft is actually a little nose heavy. They determined the weight required and already had the one side of the piece of metal sanded and a piece cut out for the drain hose from the engine to go through allowing the fuel to exit instead of pooling on the bottom. I then drilled two holes into the piece of metal.

Once that was done I marked the holes on the fuselage bottom and then drilled them through. Keep in mind that in order to accomplish this I had to remove the engine, yet again! This time though removed the mounts from the firewall itself instead of the engine off of the mounts.
Next I mixed up a batch of glue and brushed it all over the shinny (sanded) side of the metal before putting it in place on the fuselage. In order to determine its proper place had one screw up from the bottom and matched it up with the corresponding hole in the weight. Next the other screw was put in place and both got locking nuts put in place to ensure it is held on.
Worth mentioning is to make sure you use washers on the screws because this spreads the force out so that you don’t turn the screw right through the fuselage bottom and more importantly when up in the air the vibrations causes stress on the screw and this spreads the force so that it doesn’t shake loose, make the whole bigger, and cause the weight to dislodge.
Since I had a batch of glue I then spread it over the inside of the motor mount to help seal down the covering that was wrapped over as well as to add some more protection from the fuel.


What’s next?
Though the build is completed as far as the plans are concerned, hence brought the fuselage home, Peter realized there was one additional step that still needed to be completed. The tail of the aircraft isn’t supported all that well based on its original design so from club members experience I need to add some support wires which will go from the fin to the stabilizer on each side. The plan is to bring my fuselage back to Peters tomorrow in hopes of getting this done. I then might be able to bring both the fuselage and wing home, though I am curious how this will now affect the balancing!
Once that is done I am hoping to get out to the airfield this week. If it’s a nice calm day then I’m going to bring out my trainer (Sig Kadet LT 40) for some flights first. On not as nice of days it will be my 4 Star 60 to taxi around the runway to gain experience in how a tail dragger, and the plane itself, handles as takeoffs and landings will function a little differently from the trike gear of my trainer. Will also need to ensure everything is working as expected and the engine is running smoothly.
Once it comes time for the maiden voyage an experienced pilot will take the 4 Star 60 up into the air to see how the aircraft handles and get everything trimmed up (final adjustments) so the aircraft flies straight and level without hands on the controls. Or so I believe is the philosophy based on the trainer.


Pingback: Building 4 Star 60 Day 48: Stabilising Wires Installed – Devin W.C. Ryan