Though my plane according to the plans was complete, Monday I truly completed my aircraft!
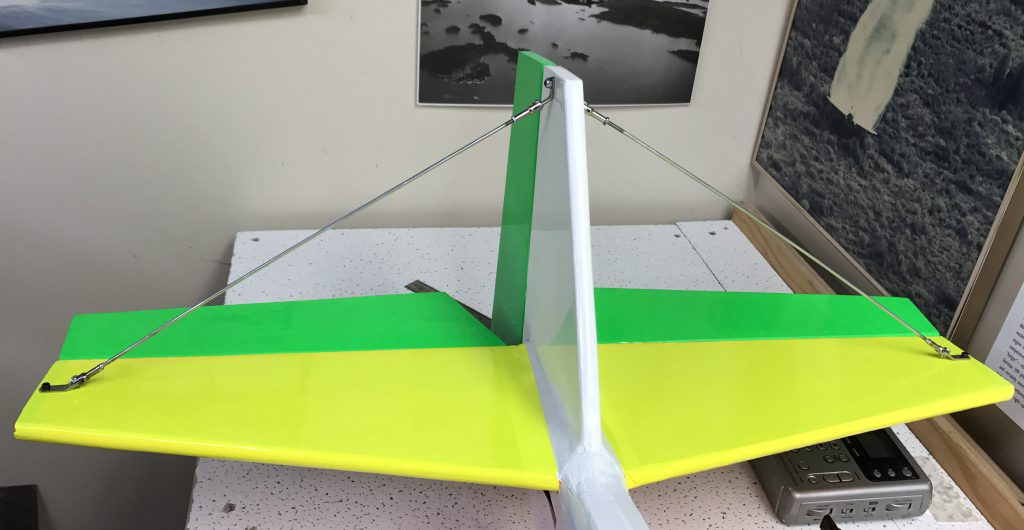
Outside of the plans, based on club members experience, I added support wires to the tail. You can see them installed in the featured image above. The reason for this addition is that a known flaw in the design of the aircraft is the weakness of the fin. If you were just flying in circles and figure eights you would be just fine but as soon as you started performing loops and rolls you would have a problem.
That problem is that the forces applied to the fin during these maneuvers would cause the tail to twist making the aircraft unstable in the air. This instability, and perhaps damage, leads to a lack of control and I believe even the potential for the fin to break.
The wires were created by John based on the ones installed on his 4 Star 60. He sautered the ends to bolt to the surfaces onto the wire. The are adjustable for length as you want to make sure they are at about the middle of the top of the fin as well as the middle of the outer edge of the stabiliser into solid wood, but not to close to the edge to ensure a firm hold.
Doing one at a time you line it up and mark where the holes need to go into the stab and the fin. Adjustments needed to be made on the ends to ensure they sit flush with the surface of the aircraft. You then drill out the holes, ensuring you go through in a straight line as you don’t want to be at an angle. Next you put the screws through (screw it in once required) and then put a locking nut on the screw through the stab. Can leave the one through the fin for now.
Then you move to the other side and place the one end of the wire in place on the screw you put through from the other side and line it up with the center of the stab. You may need to make adjustments to get the length correct. Once you are happy with the location mark it on the stab and then drill it through (you may be able to drill right through the eyelet of the wires end and through the stab). Next you place a screw through here as well and then tighten down the locking nuts on the stab and at the top of the fin.

Once that was done we had to balance the aircraft again. Note that the wing is attached for this process! Using the balancing apparatus we determined that more weight in the front was required. This consisted of installing two more pieces screwed together. Mixed up a batch of glue that was applied to the bottom of the one weight and the put into place. The smaller weight was then glued to the bottom one, via putting the screw up through the first and lining it up with the hole in the smaller weight. This was a very tight spot, as we didn’t take the engine off this time, to then get the locking nut in place. John was a big help with this part.
The last task of the day was to build something that I can use for preventing the aircraft from moving around to much when transporting it. You can see the finished product below. Essentially I did the following:
- Took a piece of board (wood)
- Marked where the wheels would sit, roughly middle, and their width
- Cut out the slots for the wheels in the board
- Cut blocks (4 for each)
- Mixed up a batch of glue
- Applied glue to appropriate surfaces and nailed each block while glue dries
- Clamped to ensure held tight
- Left everything to dry
You can see the final result in the image below. I can then place the finished product in the trunk of my car and have my 4 Star 60’s wheels sit in it to help prevent the aircraft from moving around during transport.

What’s Next
Building is truly done now! Though I still haven’t been able to get out to the airfield, as I eluded to in my last post, I am hopeful the time is coming very soon!
At first I will be bringing out my LT 40, already have my transmitter and aircraft charged and ready to go. I need to get some flights on my trainer under my belt first.