Today was a great building session and two Johns along with one other club member who stopped by for a visit today. Peter’s place was a beehive of activity! Through it all I chatted some, they conversed lots, and I kept working away to put in another 2 hrs on my plane. Today was about starting the process of covering the fuselage.
The first thing I did was measure the length of the bottom of the fuselage with about an extra inch at the front and about the same for the back which will cover over top of the existing piece. You want the front piece covering the back, which is why I started at the back and am working my way to the front of the aircraft. This allows the wind to roll over the aircraft without hooking and getting underneath the covering to peel it back.
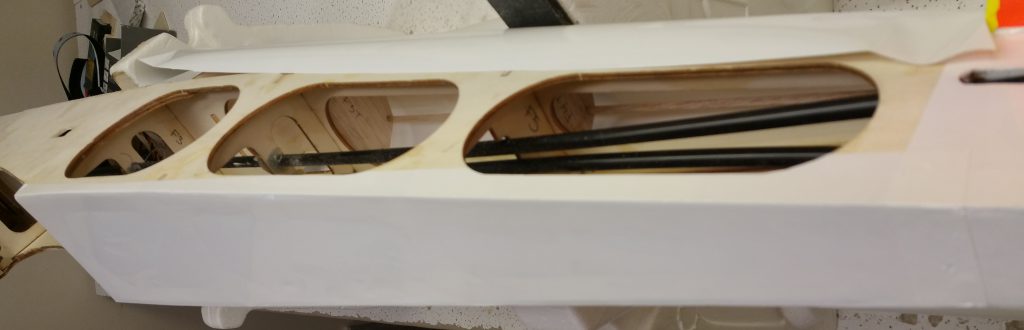
You can see the bottom covered in the top picture. In this case I cut the piece tapered rather than trying to cut this on the aircraft, which I cannot imagine would have been easy or very ascetically pleasing. I wanted about a half inch to wrap around the sides. In ordered to get this tapered cut I did the following:
- Measured the width of the bottom at its widest point plus some (9″ total)
- Measured the length of the bottom plus an inch to overlay at the narrowest and excess at the top (24″ total)
- Cut out a piece that was 9″ x 24″
- Measured the width at the narrowest part (where it will be overlapping previous covering at the tail)
- Marked the center of the covering that I cut out
- Marked each side of center the width of the smaller part plus wrap around
- Lined up the ruler and cut the angle
Once I had my piece of covering I lined it up on the aircraft and started tacking it down making sure it was taunt the length of the fuselage. I then worked the iron to get the rest of the bottom adhered, top pic. Prior to folding over the sides I made two cuts up at the front of the fuse that went straight with the outer edges. This allowed me to fold over the sides and iron those down. I then folded the excess from the sides around, ironed, and then folded the piece over the front and ironed it down as well. For the front I made some additional cuts to iron around and a little bit onto the one wing bolt hold down blocks. Once this was done the ironed was worked over the bottom some more to get the excess sag and wrinkles out from where the openings in the wood are.
Also worth noting is that where the covering came up over an opening on the side I made a couple cuts in the fabric and then ironed it to the edge of the holes. You can also see in the top picture how my covering came back over the piece covering the tail.

Lastly I started covering the the top of the fuselage. To get an idea of the width required I used a piece of string to wrap around at the highest and lowest parts taking note of the measurements. After that I followed the same process as I did for the bottom to get the angled cuts. I needed to make sure I left more excess for the back and especially the front as we are working with a convex curve. This was a meticulous task and once ready Peter held the covering in place and I ironed it on along the top center spar. I then made some slits in the covering to work it around the fin and stabilizer of the aircraft. At this point I was about 2 hrs end and decided it was time to call it a day as I’m probably looking at another hour to finish covering the top.

One mistake made was to woodpecker the bottom. There is no need to woodpecker these surfaces as it provides no benefit, as John V. pointed out, since the woodpecker does not punch holes through to the other side of the wood allowing air to escape. Not a huge deal, but there is a potential for the tiny holes to show through the covering affecting aesthetics.
That wrapped up another session on the plane and I’m still very pleased with how everything is coming together. The next session will be to complete the top covering and work on covering the sides of the fuselage.