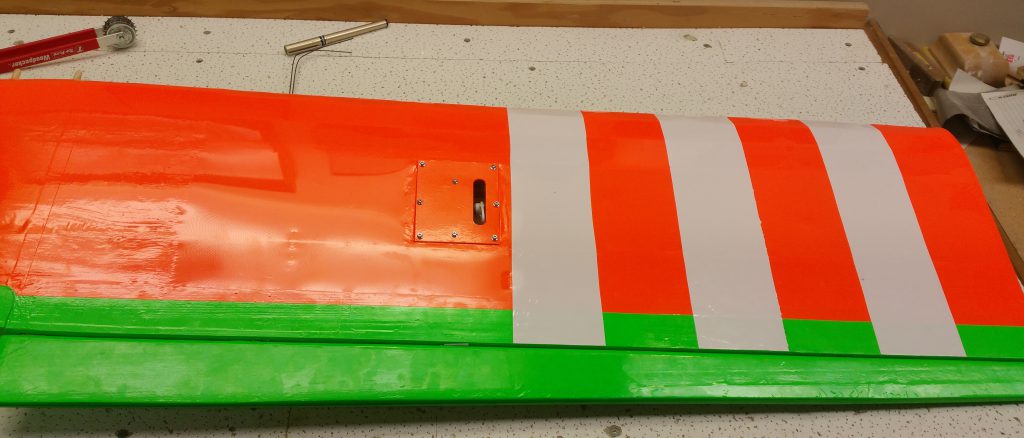
Last Tuesday I got to work on my plane again and been so busy since I’m only now getting around to blogging about it.
The first thing we did was install the wire for the tail wheel. This involved first bending the tip of the wire into a 90 degree angle and ‘sanding’ the wire to rough it up a bit which allows the glue to stick better to hold the wire into place. Then needed to drill a hole into the button of the rudder for where the end of the wire (the part bent up at an angle) will slide into. This provides a sturdier fit into the rudder, since this wire steers the tail through the wheel/rudder connection.
The remaining part of the wire that goes along the bottom of the rudder needs to be recessed into the rudder itself so that it is flush. In order to accomplish this I first lined up the wire and traced two guide lines along the bottom. Using the guide lines I drilled tiny wholes along its length to carve out a groove. I then alternated between using a drill bit to run along its length a tiny file to sand out the inside. I alternated and repeated until upon one of my checks the wire sat down into the rudder to my satisfaction. Note that we used the plans to figure out how far back the wire needed to go and also need to ensure that not to much sticks out at the leading edge that would interfere with rudder movement.
Once that was done and glued into place we then cut a piece out of a fiberglass sheet such that it would wrap around about 2 inches on each side. I then brushed glue over the fiber glass, ensuring to role any air pockets out of the fiberglass over the wire and down the sides. Once this was done it was left to dry.
The fiberglass provides additional support / reinforcement to the tail wheel assembly.

Next I went back to working on the wing and installed the invasion stripes on the bottom of each wing panel, seen in the feature picture at the top. Placing covering over top of covering can lead to an excessive amount of air bubbles forming as air gets trapped between the two layers. In order to help mitigate this issue I used the Top Flite Woodpecker Perforating Tool:

I used white for my invasion stripes as based on Peters experience the white on orange provides a good contrast when up in the air. This allows you to more easily identify the top vs bottom of the wing, and thus aircraft, up in the sky. The first step was to measure 3″ wide strips and cut them to approximate lengths (leaving extra you can trim off later). You then use the cut strips as a template and perform the following actions:
- Lay the strip along the tip of the wing to measure 3 inches in and make some marks along the edge
- Move the strip to where it will be placed and marks along the edge, between the two sets of marks is where the strip will be placed
- Run the wood pecker up along where the covering (invasion stripe) will be applied, ensuring you leave approximately a quarter inch edge inside of the markings. The tiny holes allow the air to escape.
- Then lay the covering in place and start by ironing down the centre of the strip (length wise) by moving the iron from the inside out (width wise).
- Work the iron from the inside out, ensuring to keep the iron flat, working your way to the leading edge and also to the trailing edge
- Trailing edge: ensure the strip is ironed firmly to the wing and then use a sharp knife (blade held at an angle) to cut off any excess along the trailing edge, using the edge as a guide
- Leading edge: use the iron to push the bubbles and wrinkles up and over the edge and ironed down to the other side
- Use the angle of the leading edge to trim the excess covering followed by ironing down a piece that wraps over
- I ensured the strip fully wrapped around the leading edge so the wind will not catch the covering and peel it back during flight

That concluded another few hours of work on my aircraft and I am looking forward to getting to work on it some more this week!

