Sunday we focused on getting the ailerons glued together. This aircraft has some very nice sized ailerons. 🙂
We needed to figure out how to determine the size of the 1/4” x 1/4” balsa stringers we’d need, and which piece to start with. Ended up temporarily putting in place the WT1 (1/8” Ply) wing end tip piece to measure the length from the trailing edge of the wing to the trailing end of WT1. This gave us the length of the outer edge balsa stringer of the aileron (smaller piece).
Using the diagram (Aero3D-3-view), specifically the top down view, we could read off the measurements from leading edge of the wing to the very edge of the trailing edge of the aileron to be 469 mm (18 7/16“) and just the wing (leading to trailing edge) to be 338 mm (13 5/16“) giving a length of the inner edges to be 469 – 338 = 131 mm (5 1/8“).
With the leading edge and inner and outer edges determined could pin these down ensuring the edges were square with the leading edge. This could then all be pinned in place and the trailing edge would get its angle from needing to be flush with the bottom of the inner and outer edges.
From here we could see how all the ailerons ribs will be. I measured each length and cut the 1/4” x 1/4” balsa stringers over-sized for Peter to sand to length while I continued cutting.

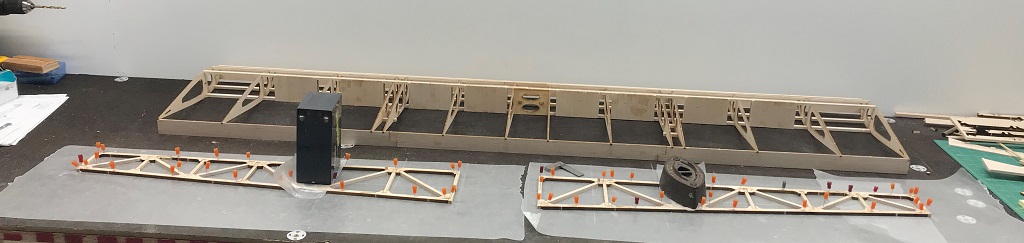
Right Aileron Frame Glued 
Left Aileron Frame Glued 
Aileron A5
Once all the pieces were cut, sanded and trial fitted (which involved cutting some filler pieces to snug things up) I mixed up a batch of slow expoxy and Peter marked where we needed glue. We then glued all the pieces in place and put a weight over where the A5 piece fits in. Which is about the middle of the aileron with a ‘stringer’ on each side. I’m guessing this is for added support.
That wrapped up another day and today planning on making some more progress.