Yesterday I worked on my plane for about 2 hours (as is about the typical session length).
When I first arrived Peter filled me in on his 2hr morning session. He got the wholes for the wing screw down bolts made. He glued the two laser cut 1/16″ plywood wing hold down plates to the bottom of the wing, flush with the wing trailing edge and centred on the wing joint. Once he glued the plate he used a block that is flat and square to drill a guide whole. In order to do this he marked the spot on the block that needed to be drilled through in order to get the wholes through the plate (one at a time) in the correct spot. Because this sets square onto the bottom of the aircraft the block ensures the drill wholes will be such that they line up square/flush with the wing hold down blocks.
Even though I wasn’t there for this Peter went through it all in detail with me. Next he marked the wholes on the wing hold down blocks and used a threaded ‘hand turning bit’ to screw into the blocks so that we have threaded holes. Once the holes were made he put some thin CA into both wholes and left it to dry as it provides a coat and strengthens the wood. Once dry he used the tool to screw into the holes again to ensure no glue is blocking the thread. He also sanded away the filler stuff, I just realised from the last post pictures to these! 😛


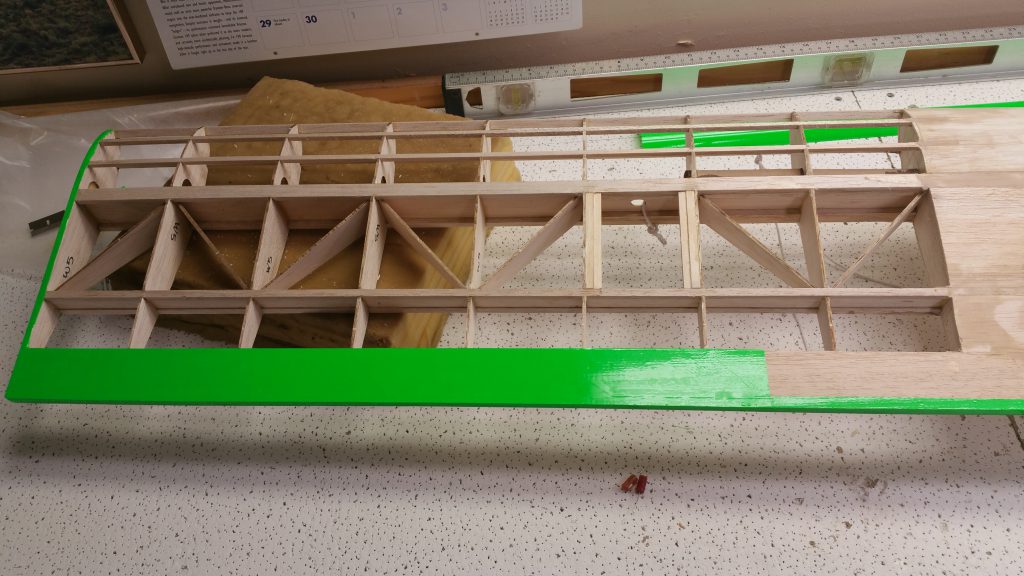
Once we went over everything we dove back into covering. I started by doing the trailing edge which took about 4 pieces. I started at the ends and worked my way to the centre. Need to makes sure to make a little cut to accommodate the wing hold down plates. Once the trailing edge was covered, while we can still see the pencil marks, I went through and found the slots made for the hinges and cut the covering along the slots. Even with the markings they can be very tricky to find! I used the back of the knife (that’s not sharp) to tap around where I think it is (about the centre of the trailing edge from the pencil marking) until I poke through in the right spot.
Once all those were done I started covering the bottom trailing edge sheet, which you can see the in image at the top of the post and the one below. This is also going to be green along with my ailerons. For the trailing edge sheet I make sure that the one edge of the covering is straight and lines up with the ‘top’ part of the sheet, no overhang so I don’t have to cut it except for perhaps making sure I round any tiny bit over with the iron. Then once the covering is on I use a sharp blade to cut the edges off, holding the blade at an angle to the corner and run it along. Now I just need to settle on what the top and bottom of the wing is going to be, one will be yellow the other orange.
I’m not sure why but I struggled a little bit more with the covering this time around and had to ditch a few pieces, heating it back up to remove it and then try again with a fresh piece. I am being quite meticulous but trying not to be to much so!
One thing for sure is that covering is an art form!
